Sunday, October 31, 2010

Halloween Traditions

This post may be a little late for some of you, but if you're just now carving your pumpkins today, don't forget the most important part--the seeds!

I've carved a pumpkin every year since I can remember. Actually, let me take that back. When I was too young to handle knives etc., I would color a face on a pumpkin with paint markers! My family would always have those stencil kits, and I remember that every year, I would choose more and more complicated stencils, always trying to keep up with my dad and brother. One of my favorite parts of carving pumpkins has always been the roasted pumpkin seeds that my dad would make afterward.

This year, I kept up the tradition, even though I wasn't home to carve with my dad (the only other family member that still carves with me--and he didn't even carve this year so I'm the only one carrying on the tradition). I didn't have a stencil kit, so after deciding on an owl--a homage to Athena and my summer in Greece--I drew it onto my pumpkin and went at it.


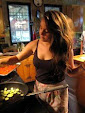
Didn't turn out too bad for not having a stencil! Caitlin's boyfriend, Gavin, also carved an owl so we have two of them sitting on our porch at the moment. Next, it was roasting time!

Roasted Pumpkin Seeds

Ingredients:
Pumpkin seeds
Olive oil
Worcestershire sauce
Garlic power
Salt
Pepper
*all to taste and depending on how many pumpkin seeds you have.

Directions:
Slowly, sift through the pumpkin guts till you have all the seeds. This takes quite a while. I was so happy that my one pumpkin provided so many seeds. Place the seeds in a collender and wash them with cold water. Pick all the remaining pumpkin gunk out of the seeds and wash them off again.


Once they're all sifted through, boil some water and place the pumpkin seeds in it for about 5 minutes. Drain them and place them in a bowl. Add the remaining ingredients so that the seeds are lightly coated in the seasoning. Place on a cookie sheet and roast in an oven at 375. Every 10 or so minutes, stir the seeds so they can get evenly toasted. I like mine to be nicely golden brown and crunchy so I keep roasting them till I get them to that stage, about 30-45 minutes, depending on your seeds.


These are so delicious and so addicting! They turned out just like they always did when my daddy would make them for me. I would send some to him to show him that I can do it too, but I think I'll have them devoured before I get to that.

Sunday, October 17, 2010

Friends and Food

Shortly after I moved in, two of my high school friends, Staecy and Amanda, came up to Davis to visit me in my new home. We decided to have a night of cooking and since I'd been craving pierogies ever since I wrote my post about my European food adventures, we decided to satisfy my tummy and set out to make these little pockets of goodness. While I don't have exact amounts for the ingredients in the filling (I was too busy having a blast with my girls to write down my expact procedure), it's not really necessary to get that exact.

Potato Pierogies with Cabbage, Pancetta and Browned Onions

Ingredients:
For the dough: (adapted from Gormet on Epi)
3 cups all-purpose flou
1 cup water
1 egg
2 teaspoons vegetable oil
1 teaspoon salt
For the filling: (I made extra so I could have leftovers for potato pancakes)
Several  large baking potatos
1-2 cups sour cream
1 1/2 cups sharp white cheddar (or more)
Salt and pepper
For the cabbage:
Several tablespoons of butter
1 head of cabbage sliced thinly
1 onion sliced thinly
1/2 cup chopped pancetta
Salt and pepper

Directions:
First off, get some water boiling for the potatoes. Clean the potatoes and cut them in half if they are large. When the water starts boiling, place the potatoes in the pot and boil until the potatoes are tender, about 8-12 minutes.
Meanwhile, combine the ingredients for the dough. Transfer to a lightly floured surface and knead until the dough is smooth and elastic--about 8 minutes.
Let the dough stand while making the filling. Once the potatoes are ready, drain them and remove the skin. Mash them with a fork till there are no chunks and mix in the sour cream, cheese, salt and pepper to taste. Add as much as you want, I definitely added quite a good amount of sour cream and cheese!
Roll out the dough thinly on a lightly floured surface. This will take a while.
If you've got helpers with you, like I did, get them started on chopping the pancetta, onions and cabbage. Start melting the butter and browning the onions on a medium-low setting. Add the pancetta once the onions have started softening.
Once the dough is rolled out, cut out circles (I used a glass cup to cut through the dough), rerolling the extra dough until it is all cut.
Get some water boiling again--this time, to cook the pierogies.
To construct the pierogies, dollop a bit if the filling in the center of the dough. Moisten the edge of the dough circle with a bit of water (I just kept a cup of water by my side, dipped my finger in it and used it to moisten the dough) and close the circle of dough into a half circle--making sure the dough is pinched together around the sides so the filling won't come out.
To cook the pierogies, add them to the boiling water for about five minutes. Meanwhile, melt a bit of butter in a large skillet (you might need several skillets going if you want to cook them all at once). Once they are al dente, drain them and put them in the skillet to brown. Once they are browned on one side, flip them over to brown on the other side. Note: This step is optional. In Europe, the pierogies I had were only boiled and never browned, but I really like them with a crunchy outer shell.
Meanwhile, turn down the onions and pancetta to a lower heat setting and add the cabbage. Allow it to wilt down and soak up the sauces from the onion and pancetta.
Once the cabbage is nicely cooked and the pierogies are nicely browned, plate and enjoy!

It takes a lot of time (and I had two awesome friends helping me!) but these are really worth it once you get to sit down to enjoy them. The filling is so smooth and tasty, and I love the crunchiness of the outer shell. The cabbage is a perfect side, especially with the hearty, browned onions and salty pancetta. If it's raining where you are, like it is here, this would be the perfect meal to make and enjoy while cozying up against the rain with a few friends.

Saturday, October 16, 2010

Who Needs a Real Oceanview When You've Got Potato Pancakes?

My mom has raved to me about Bette's Diner for years and I've always thought she was exaggerating a bit--although the scone mix she always brought home from their shop was always delicious, even though I'm not a huge fan of scones. When I went to Berkeley with my family for the Davis v. Cal game, I finally had the chance to try this place out. I was not let down!

Bette's Oceanview Diner
1807 Fourth Street
Berkely, CA 94710
510-644-3932


Bette's Oceanview Diner (which doesn't actually have an ocean view, my brother and I were disappointed to find out) is located in a beautiful section of Berkeley CA. The air was so crisp that morning and as we waited for our turn to be seated (there is always a long dinner at Bette's), mom and I wandered around the area, looking at all the small shops. We stopped in a paper store right down the street, where I got two beautiful screen printings on mulberry paper for my new home. When it was finally our turn, we decided on the outdoor seating, right on the sidewalk, where they bring you fleece blankets to keep cozy. After joking around with the amazing host, whom my mom claims is always there, we settled in to look at the menus. There were so many choices and we definitely ended up over ordering, but it was well worth it.


Bette's Potato Pancakes-German style potato pancakes with sour cream and house-made apple sauce! I remember the first time I was urged to eat potato latkes with apple sauce and sour cream--I thought it was an absolutely insane idea but ever since, I've been addicted. These were delicious and were the perfect combo of crunchiness without becoming all dried out on the inside. The apple sauce was delicious as well and reminded me of making apple sauce with my mom every fall as a child.


"California Breakfast"-Poached eggs on ham and toast with a lemon-herb butter sauce, grilled tomatoes and home style potatoes (with an addition of avocado, as per the waitress' suggestion). The eggs we poached beautifully and what goes together better than ham, avocado and eggs? The sauce was to-die-for and brought together all of the flavors wonderfully. The tomatoes were wonderfully ripe and grilled to perfection and really topped off this gorgeous meal.


Salmon and Potato Breakfast-Potatoes and with flakes of grilled salmon, in their lemon-herb butter sauce, served with poached eggs, grilled tomatoes and toast (their special for the day). Wow, was this good. There wasn't a great amount of salmon in the potatoes, but somehow the salmon flavor shined through, brilliantly. The potatoes were cooked so well--perfectly done on the inside, yet crispy brown on the edges--a perfect style for this dish. This was such a hearty breakfast plate, and perfect for the cold morning outdoors.

I'm so happy to say that I have finally made it to Bette's Oceanview Diner. I had a wonderful breakfast with my family, amidst a charming setting and wonderful staff. Now, my stomach is telling me that I have to make my way back there soon.

Sunday, October 3, 2010

Home Grown

The excitement over the last few days? Discovering a fruit tree in the backyard!
The other day, I was in the kitchen and heard a knock on the window. It was Caitlin and she was holding some oblong, green, fuzzy thing. I went outside to discover that the tree outside our kitchen was producing fruit! Weird looking fruit at that.
I went inside and got a knife to cut it open. The inside looked like a really gooey and less seedy fig but the outside was definitely too tough to be any sort of fig.
It smelled delicious! It reminded me of the grapes that we used to grow in the backyard of my childhood home. Those grapes tasted and smelled nothing like the grapes from the store, but I would sit outside and pick them and eat them for hours; resulting in an awful stomach ache.
I took a bite of the inside and was pleasantly surprised. Okay, it's definitely not the best tasting fruit I've ever had, but it was also definitely not bad! It wasn't too sweet and just a tad sour and had a delicate taste.
After calling the troupes on facebook to figure out what this fruit was, and a few google searches later, I had my answer--I have a Pineapple Guava tree growing in my backyard.


On the tree. They kind of look like really big almonds to me.


If I'm good, you'll see some Pineapple Guava jam on here in the new future. If not, maybe I'll try next season.

Saturday, October 2, 2010

Cheeseboard #2

Back to Cheeseboard! Of course. This time, I went with my brother and my dad after the Cal v. Davis game. I needed some cheering up after the incredible loss, and Cheeseboard pizza was just what the doctor ordered.

The Cheese Board Pizza Collective
1512 Shattuck Ave. Berkeley, CA
510-549-3055

I sadly forgot to write down what was on the pizza and it's been a while since I ate it, so I sadly cannot remember exactly what was on it, but I do remember that there were figs, gorgonzola, mozzarella, and arugula. Mmm, delicious!


We ate on the median-per custom. It was dad's first time and it was a successful one at that. It was so rich between the figs and the gorgonzola but it was just perfect for some comfort food especially with a bottle of delicious apple cider that tasted like apples right of the tree in the fall.


Check out my last post from cheeseboard to learn more about the place! Quality ingredients, delicious food and good people.

Friday, October 1, 2010

Calming Down

The last month has been crazy busy and I've felt like I've had so much on my place and nothing to do all at once. How does that happen? I guess after traveling, many of the things I had to do just felt too trivial or boring to actually consider them to be of any importance. But no worries, I'm out of my post-traveler's-melancholy and I'm back in school (one and a half weeks in). Now that I have a normal schedule, the blogs should be coming out more regularly. The more things I have to do, the more productive I get.

I've been obsessed with zucchini and yellow summer squash lately--probably because I can't resist these beautiful vegetables whenever I go to the farmer's market or the co-op. Browning them in a skillet with a little bit of salt and pepper is definitely my new favorite thing to do. I'm putting it in every dish imaginable! I also had a short lived obsession with orange cherry tomatoes, because there was such a bountiful supply of them at the co-op. Seriously, living so close to this place is going to be the death of me. Or at least my bank account (ignore that, mom and dad)! This meal is such an easy fix on hot nights, when I wanted to be using my new kitchen, but I also feel like exercising little-to-no movement plus having a delicious meal on the table. 

Summer Vegetable and Polenta Mess

Ingredients:
A few slices of prepared polenta
A handful of cherry tomatoes
A few chunks of garlic
1/4 a red bell pepper, sliced
A big handful of sliced zucchini and yellow summer squash
A big spoonful of marscarpone (cream cheese, craime fraiche or sour cream works as well)

Directions:
Fry up the polenta with some oil on both sides.
Meanwhile, brown the zucchini and squash. Add the garlic, pepper and finally the cherry tomatoes closer to the end. Season with salt and pepper.
To construct, dollop the marscarpone on the polenta, then top with the sauteed veggies.
Devour.


So simple. So beautiful. Perfect for the end of summer. I love using up all of my delicious vegetables and having it come out this good!